Showing posts with label Desserts. Show all posts

Tuesday, October 7, 2014

Old Fashioned Chocolate Cake

Y'all know one of my favorite things to do is baking and one of my go to recipes is old fashioned chocolate cake! This is a great base recipe for cake, cupcakes and even layered desserts. I use buttermilk to keep the cake moist and ground flax seed meal as a binding agent. Try this recipe at your next dinner or get together and it will definitely be a hit!

Ingredients
- 2 cups all purpose flour
- 1/2 cup unsweetened cocoa powder
- 1/2 cup white sugar
- 3/4 cup brown sugar
- 1/3 cup buttermilk
- 2 TBSP vegetable oil
- 1 cup water
- 1/4 cup ground flax meal mixed with 3 TBSP hot water
- 1 TBSP vanilla extract
- pinch of salt
- 1 TSP baking powder
- 1 TSP baking soda

Directions
- Preheat oven to 350
- Mix liquid ingredients in a bowl with flax seed mixture, white and brown sugar. Mix until sugar is almost dissolved.
- Sift dry ingredients together in a large bowl and slowly combine liquid mixture. Mix with wooden spoon until smooth mixture forms.
- Pour cake batter into cake pan and bake for 35-40 minutes or until a toothpick inserted comes out clean.
- Cool completely.
- Frost with butter cream or fudge frosting.


Tuesday, May 27, 2014

Zucchini Bread

This recipe is from my sister-in-law- Priya, she loves to cook and bake just as much as I do, and she always finds these awesome recipes, and I can't thank her enough! So this weekend she made this yummy Zucchini bread and forwarded the recipe to me along with a sample and it was really yum! It is moist, sweet-but not too sweet, a little spicy and it's got zucchini in it! Try it out and let us know what you think!

Ingredients
- 2 cups zucchini shredded
- 3 cups all purpose flour
- 1.5 TSP baking powder
-1 pinch of salt
- 1 TBSP cinnamon
- 1 TSP ground cardamon (optional)
- 1 cup sugar
- 1/3 cup light brown sugar-packed
- 1 cup oil
- 3 TBSP sour cream
- 1 TSP vanilla extract
- 2/3 cup greek vanilla yogurt.
- 2/3 cup chopped walnuts (optional)

Directions
- Preheat oven to 350.
- Combine dry ingredients together in a bowl.
- Whisk sugar, oil, sour cream, vanilla extract and yogurt in a bowl until well combined.
- Add dry ingredients in thirds and mix together. Add shredded zucchini and walnuts (optional) and mix until shreds and nuts are distributed evenly through out  batter.
- Pour batter evenly into two lightly greased loaf pans.
- Bake for 40-50 minutes or until toothpick inserted in the center comes out clean.
- Cool completely.


Monday, April 14, 2014

Avocado Milkshake

This is my favorite milkshake flavor! I know what a lot of you guys are thinking, avocado's should only be used for guacamole! Give it a chance and I promise you'll love it. The great thing about this shake is because the avocado is super rich and creamy, you don't need a lot of ice cream, you can use Greek vanilla yogurt instead or leave it out all together!

Ingredients
- One medium/large avocado- pitted and scooped
- 1 cup milk
- 1/2-2/3 cup crushed ice
- 1-1/2 TBSP sugar, honey or agave nectar
- 1 scoop vanilla ice-cream or 1/3 cup Greek vanilla yogurt

Directions
- Place all of the ingredients into a blender and puree until smooth.
- Enjoy!


Sunday, December 29, 2013

Awesome Orange & Chocolate Chip Cookies

Happy Holidays everyone! I hope everyone enjoyed their Christmas and enjoyed spending time with their loved ones as much as I did.  If your Christmas was anything like mine, you ate, ate, & then ate some more.  Today's recipe is one that I found in a cookbook my mom had hidden away at her home.  The recipe was quick and easy to make but the best part of it all is that it's almost vegan - ALMOST.  But it can easily be made into an all vegan recipe; matter of fact the recipe was for a vegan cookie, I just altered it a bit.  All that aside, it is an amazingly awesome cookie that tastes like a citrus chocolate burst as described by the hubs.  Try making them for your new years eve party or any party and share your thoughts with us!  After doing all this eating, can you guess what everyones new years resolution is in my house?!

Ingredients:
1/2 cup canola oil
3/4 cup sugar
2 tsp pure orange extract
1/3 cup soy or almond milk
1 TBSP maple syrup (I used light agave nectar)
2 & 1/2 cups all purpose flour
1 tsp baking soda
1/4 tsp salt
3/4 cup dark chocolate chunks (I used 3/4 cup semi sweet chocolate but will use 1 cup next time)
Zest of 1/2 of an orange (optional)

Directions:
1. Preheat oven to 375 degrees.
2. Combine the oil, sugar, extracts, soy milk, & maple syrup.
3. Sift in flour, baking soda, & salt.
4. Stir in chocolate chips until evenly incorporated.  The dough will be VERY sticky!
5. Spoon tablespoon-sized portions of the dough onto a parchment-lined baking sheet.
6. Flatten slightly and bake for about 10 minutes or until golden brown on the bottom and baked all the way through.
7. Transfer to a wire rack to cool.
8. Enjoy!

Close up view of the cookies


Sunday, December 8, 2013

Peppermint Bark

I hope everyone is staying warm out there! I have been stuck in the house for three days due to a crazy winter/ice storm here in Dallas! This weeks recipe is fun, real easy and really great with the holidays around the corner. Make fun gifts for friends and family, just double or tripe the recipe and wrap in individual bags! Hope y'all enjoy it as much as I did!

Ingredients
- 12oz semi sweet chocolate
- 12oz white chocolate
- 2-3 candy canes
- 1/2 tsp peppermint extract

Directions
- Place candy canes in a Ziploc bag, and crush with a rolling pin, hammer or whatever you have handy!
- Line a 9x13 baking pan with foil.
- In a double boiler melt semi sweet chocolate chips until completely smooth, add peppermint extract and mix. Pour melted chocolate into lined baking pan, set aside for 20 minutes until set.
- Melt white chocolate in a double boiler until smooth (watch the chocolate constantly, it can burn quicker than regular chocolate). Pour over the set semi sweet chocolate. Sprinkle crushed candy canes over white chocolate. Set baking pan aside until chocolate has set.
- Break the peppermint bark into small pieces. Enjoy!


Tuesday, August 13, 2013

Cinnamon-Pecan pie crust (Gluten-Free)

I've been on the lookout for a really good, gluten-free pie crust and I've finally found it! I found this recipe on allrecipes.com but tweaked it a little to give it a twist! I went to my local grocery store to pick up pecans, and stumbled upon the cinnamon pecans- they're dusted in a little sugar and cinnamon and oh so good! I used that as the base for this recipe, if you don't find cinnamon pecans, you can use regular and add some cinnamon and a little extra sugar! This is great as a cheesecake pie crust, or fill it with ice cream or even fresh fruit and whipped cream and I promise it will not disappoint!

Ingredients
- 3 cups cinnamon pecans
- 3 tbsp melted butter
- 2 tbsp sugar

Directions
- Place pecans and sugar in a food processor and grind until fine 'crumbs' form.
- Add butter and pulse until it starts to come together.
- Press mixture into a lightly greased pie dish and refrigerate for at least four hours, preferably over night. (wrap with
foil or saran wrap).


Sunday, July 21, 2013

Magic Cookie Bars

A friend of mine asked me for a recipe for magic bars a couple of weeks ago because she wanted to bake them for her hubby.  I initially tried these delish treats in college at my friend Beth's halloween party and instantly fell in love with them!  Over the years, I've made several variations of magic bars but this is the perfect combo that I've come up with.  This recipe is so quick and easy that most of the time, my hubby is the one that makes them in my house.  Make them for your next party and let us know how they turn out!

Ingredients:
1 stick unsalted butter (or 1/2 cup butter)
1&1/2 cups graham cracker crumbs
1 (14 oz) can fat free sweetened condensed milk
2 cups semi-sweet chocolate chips (I typically use 1c semi sweet & 1c butterscotch chips but you can use any variation you like)
1 & 1/3 cup sweetened coconut flakes
1 cup chopped walnuts

Directions:
1. Preheat oven to 350 degrees (325 for a glass dish).
2. In a 13x9 inch baking pan, melt butter in the oven.
3. Sprinkle graham cracker crumbs over butter.
4. Pour condensed milk evenly over crumbs & top with remaining ingredients.
5. Press down firmly with a fork.
6. Bake for 25 minutes or until lightly browned.
7. Cover with a dish towel and cool overnight.  You can also chill them if desired.
8. Cut into bars or diamonds and store at room temperature.
9. Enjoy!


Sunday, May 5, 2013

Orange Chocolate Chip Cake

If I were to combine chocolate with a flavor, 95% of the time I would pair it with orange. I love the citrus flavor with chocolate, nothing beats it! This is one of my favorite cake recipes, my sister surprised me and came down from Phoenix for a few days, so I thought I would show her my appreciation through this yummy dessert! The ganache is optional for those who don't want chocolate over load. I hope y'all love it as much as she did!

Ingredients
   Cake
- 1-1/3 cup all purpose flour
- 1 stick of butter
- 1 cup sugar
- 1/2 TSP baking powder
- 1/2 TSP baking soda
- 1 TBSP vanilla extract
- 1/3 cup buttermilk
- 3 TBSP orange juice
- 2-3 TBSP grated orange zest
- 3 TBSP ener-g egg replacer mixed with 1/4 cup water
- 1-1/4 cup semi sweet chocolate chips mixed with a little flour
  Ganache
- 1/2 cup semi sweet chocolate chips
- 1/4 cup heavy cream


Directions
- Pre heat oven to 350.
- Sift dry ingredients into a mixing bowl and set aside
- Cream butter and sugar with a hand held mixer until light and fluffy. Then add ener-g egg replacer mixture, orange zest, vanilla extract, orange juice and butter milk and mix until well combined.
- Add dry ingredients in thirds to the wet ingredients and mix with hand held mixer.  Fold in chocolate chips. Pour in a lightly greased pan and bake for about 30 minutes or when an inserted toothpick comes out clean. Cool Completely.
- For the ganache heat heavy cream and chocolate chips on a double broiler until chocolate chips are completely melted.
- Transfer the cake to a plate or cake stand and spoon ganache over the top of the cake.

Serving size 8-10.


Sunday, April 28, 2013

Almond Joy Macaroons

Hello All! It has been a week of emotions. I am happy to announce that this week, we launched our official FB page - Texan Veggies (be sure to like us to receive our weekly updates) as well as an Instagram page.  On the other hand, I am writing this blog with a heavy heart because a good friend of my husband's, someone he considers a brother, tragically lost both of his parents this week.  It only makes you realize that life is short and therefore, you should cherish every moment with those you love and care for.  When my husband spoke with his friend, he was at peace with what happened and insisted that the only thing he wanted was some goodies from the "Texan Veggies" girls.  His calm nature inspired me to make a "care pack" for him and his sweet family to comfort them through this difficult time.  Here is this week's recipe...

Ingredients:
2 packs (14 oz) sweetened flaked coconut
1 can fat free sweetened condensed milk
2 TBSP fat free sour cream
1 TBSP fat free half & half
1 & 1/2 tsp Mexican vanilla extract (can use regular vanilla as well)
1 cup toasted whole almonds
3/4 bag bittersweet chocolate, melted
Bakers Joy non stick baking spray

Directions:
1.  Preheat oven to 325 degrees.
2.  Toast almonds in an oven at 350 degrees for 5-7 minutes.
3.  In a food processor, pulse 1/2 cup of toasted almonds until they are roughly crushed.
4.  In a large bowl, mix coconut, condensed milk, vanilla extract, sour cream, & half & half.
5.  Scoop some dough/ mixture in your hand, place an almond in the middle, and roll into a ball.
6.  Spray cookie sheet with non stick baking spray, & place the rolled cookie balls about 1/4 inch apart.
7.  Bake cookies for 23-24 minutes until they look golden brown.
8.  Melt chocolate in a microwave safe bowl and heat in increments of 30 seconds until it is completely melted, stirring the chocolate in between every increment.
9.   Dip half of the cookie in chocolate, roll it in almond pieces, and place in a container or tray lined with parchment paper.
10.  Refrigerate for 20 minutes before serving.
Makes about 3 dozen cookies.


Sunday, April 21, 2013

Shrikand

Shrikand is a yogurt based Indian dessert, you sweeten it with sugar and mix your favorite toppings, it is so easy and simple to make! I use Greek yogurt which makes it really rich, creamy and tangy. The great thing about this dessert is that it is really versatile, you can use whichever fruits and nuts that you have on hand! Some add-ins that I have used are pomegranate, pistachios, slivered almonds, chocolate chips, mango...and the list goes on! Traditionally this dish has a few pinches of saffron, which gives the dessert this awesome pale yellow color and a distinct flavor but it is completely optional.

Ingredients
- 32 oz Carton 2% Greek Yogurt (I like Fage)
- 1 cup super fine sugar
- 2 pinches of saffron (optional)
- 1-1/2 - 2 cups of your favorite add-ins

Directions
- Empty contents of the yogurt carton into a large sheet of cheesecloth lined colander.
- Bring all four corners of the cheese cloth together, twist the four corners together and tighten it around the yogurt, squeezing any excess water from the yogurt. Secure with a rubber band. Place in the refrigerator for 2-4 hours.
- At this point most of the liquid will have drained, squeeze the tied cheese cloth a few times to get the last drops of liquid out.
- Place sugar and contents of cheese cloth in a large bowl (the yogurt will look like thick ricotta cheese), and with a hand held mixer, whisk on medium speed until the sugar is well incorporated (you will know the sugar has been well combined with the yogurt when the shrikand becomes shiny).
- Taste the shrikand, if it is not sweet enough add necessary amount of sugar and keep mixing.
- Fold in your favorite mix-ins along with the saffron and enjoy!

Serving size- about 6 people


Monday, March 11, 2013

Chocolate cake in a mug!

This recipe is so awesome, and I know I say all of my recipes are...but this one really is! Who ever thought you could make cake in less than a minute?! It was my moms birthday on Thursday, so I got home from class and whipped this up in literally 5 minutes, and it's the perfect size for one person! If you're running tight on time or really want to impress your guests, try this out! They'll love it! Serve warm with a scoop of ice cream or cool whip. YUM!

Happy birthday to the greatest mom!

Ingredients
- 3 TBSP all purpose flour
- 1-1/2 TBSP unsweetened cocoa powder
- 2 TBSP packed brown sugar
- 1 TBSP powdered sugar
- 1/4 TSP baking powder
- 1-1/2 TBSP vegetable oil
- 1 TBSP apple sauce
-1/2 TSP vanilla extract
- 3 TBSP buttermilk or milk
- 1/4 cup milk chocolate chips

Directions
- Sift flour, cocoa powder, powdered sugar, baking powder in a mixing bowl.
- In another bowl mix brown sugar, apple sauce, vegetable oil and buttermilk together. Try dissolve as much of the brown sugar as possible. (It won't completely dissolve)
- Combine dry ingredients and wet ingredients. Mix until smooth mixture forms. Add chocolate chips.
- Pour in a large mug or two small mugs and microwave on high for a minute and twenty seconds (cooking time varies, depending on microwave). Insert tooth pick to check if it's done.
- Scoop some ice cream and serve immediately!


Sunday, December 2, 2012

Gingerbread Men!

Tis' the season to be jolly! The holidays are here and so much fun, and I wanted to share one of my favorite holiday cookie recipes with y'all! These are fun to make, decorate and eat! They're great if you have children coming over, get them to decorate these treats, they'll stay out of trouble and you'll have once less recipe step to complete! I love the combination of cinnamon and ginger, with a touch of white chocolate.. SO good!   

Ingredients
- 1 stick of unsalted butter at room temperature
- 1/2 cup firmly packed light brown sugar
- 1/2 cup golden syrup
- 2 TBSP ener-g egg replacer + 1/4 cup water mixed thoroughly
- 2-1/4 cups plain flour
- Extra flour for rolling out
- 1 TSP ground cinnamon
- 1 TSP ground ginger
- 1 TSP baking soda
- 4 oz White chocolate
- sprinkles/chocolate chips/icing pens

Directions
- Preheat oven to 350. Line two baking sheets with parchment paper that have been lightly sprayed with cooking spray.
- Using a mixer or handheld mixer, beat butter and sugar in a bowl until pale and creamy, then add the golden syrup and egg replacer mixture and beat until combined. 
- Slowly stir in the flour, ginger, cinnamon and baking soda. 
- Turn onto a lightly floured surface and knead softly until smooth. Press dough into a disc and cover with plastic wrap and place in the fridge for 30 minutes-1 hour to rest.
- Turn dough out on a clean, dry surface that has been floured, then roll out until about 1/4 inch thick. Use a gingerbread man cutter to cut out shapes. Place on trays about 1 inch apart. Keep repeating with any excess dough
- Bake in oven for about 10-12 minutes or until cookies start to brown. Remove from oven. Transfer to a rack to cool.
- Melt white chocolate in a microwave safe bowl for 30 seconds. Transfer to a ziploc bag and cut a small corner of the bag. Pipe eyes, mouth and buttons onto the gingerbread men, and decorate however you want! 


Tips
- if dough is too sticky add flour TBSP at a time until dough is soft but doesn't stick to hands or surface.
- when rolling out the dough, flour rolling pin and cookie cutter to prevent sticking.
- if you don't have gingerbread cookie cutters, then use any cutter you want or use the mouth of a drinking glass (dip the mouth in flour to prevent sticking)
- if you don't use all the dough, you can refrigerate for up to a week in an airtight container, or freeze for a month.
- You can find golden syrup in most grocery stores, usually in the British aisle. I use Lyles golden syrup. If you can not find it, a substitute for this can be found on this website : http://www.foodsubs.com/Syrups.html


Serving size
- makes about 3 dozen gingerbread men.

Sunday, November 4, 2012

Caramel Apples!

I've been wanting to make these for a really long time, they're too good! I was planning to make the caramel from scratch but heard all these horror stories about it...sooo I decided against it, especially since it was my first time making this. Instead I found a really great short cut, using soft caramel candy! It worked! It took me less then 20 minutes to make! It was so easy! I did a coat of chocolate (this obviously takes a little more time) on top of the caramel covered apple for some extra yum, but if you don't want to then that's totally fine! 

Caution- using caramel candy for making caramel can still be dangerous so please use gloves when handling the bowl and keep little children away while making this! 

Ingredients
1 cup unwrapped soft caramel candy
1 tbsp milk
2 medium sized granny smith apples/3 small granny smith apples
1/2 cup whichever chocolate chips you fancy!
popsicle sticks

Directions
- in a microwave safe bowl combine caramel candy and milk and microwave for 1 minute 30 seconds. Stirring once after a minute. (if caramel isn't completely melted, microwave for additional ten seconds)
- skewer the washed apple with a Popsicle stick and dip into the caramel until apple is coated. Let stand over the bowl for about 10 seconds so extra caramel drips off. 
- set apple on a tray lined with aluminum foil that's been greased with non stick spray. Let the apples set in a cool dry place. (They don't take long to set about 20-30 minutes)
- if coating with chocolate. Melt chocolate in microwave safe bowl and after apple has been cooled and has set, dip into chocolate, place apple back on foil and refrigerate until chocolate is firm.
- cut the apple right before serving, or apple will start to brown and oxidize.


Sunday, October 28, 2012

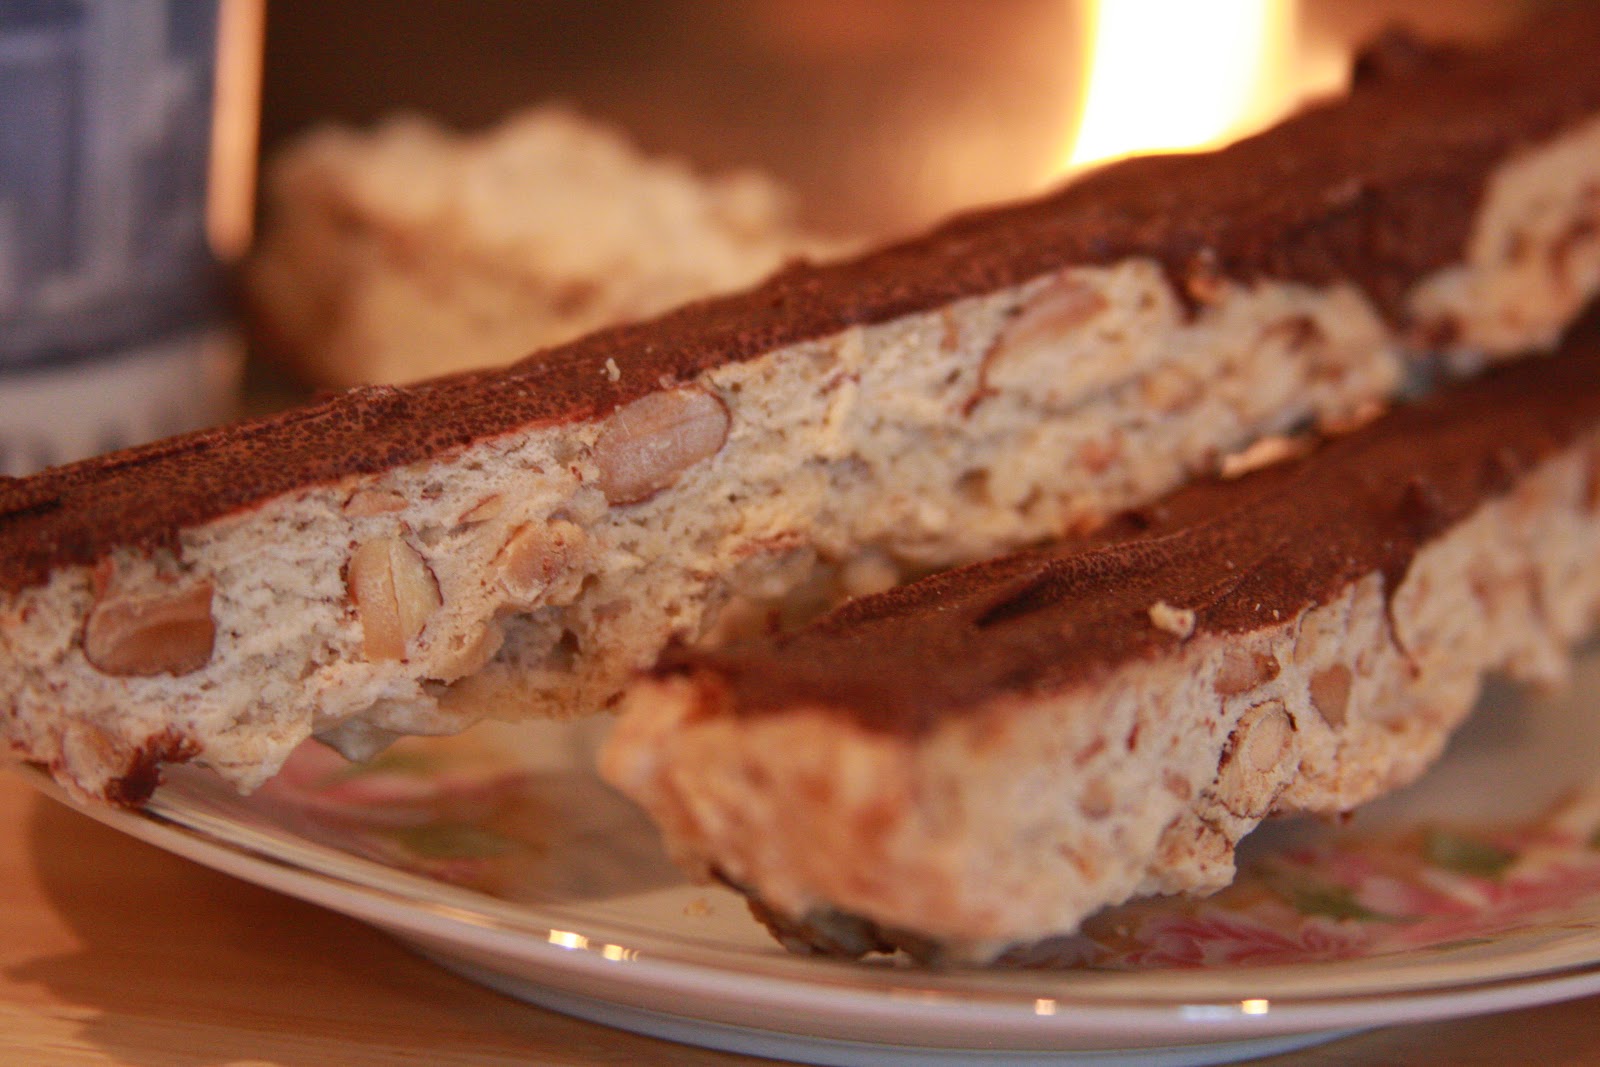
Almond Biscotti

I am not sure if I've told this little bit of information about myself with you guys but one of my favorite things in the world is coffee (and more recently tea)! I simply CANNOT live without that caffeine intake every morning and trust me when I tell you, I have tried.  Anyway, one of the things I love to dip in my coffee or tea is biscotti. Biscotti just puts me in a good mood for some reason and let's just be honest, who isn't happy eating a cookie dipped in their favorite beverage?!  I had been looking for a recipe for a while and stumbled across a few but never made it.  But this week I decided to be brave and make this yummy treat at home to see if I could come up with a great egg free recipe to share with y'all (there are lots of recipes out there and this is one that combined ingredients from several of them).

Before I dive into the recipe, I will warn you of a couple of things...1. this recipe is somewhat time consuming but the end result is worth the time spent; & 2, I baked this 3 times but the batch turned out a bit more crunchy than I was hoping so I would recommend baking it twice instead of the 3 times if you're wanting something a little less crunchy.

Ingredients:
2 cups all purpose flour (you can also use wheat pastry flour) 
1 tsp baking powder
1 cup sugar
Dash of salt 
1 tsp pure vanilla extract
1 tsp almond extract
1 tsp anise extract 
1 cup raw almonds, toasted
7 & 1/2 tsp Ener-G Egg Replacer powder
10 TBSP of warm water
1/2 cup semi sweet or milk chocolate chips

Directions:
1. Preheat oven to 300 degrees.
2. Place your almonds on a baking sheet to toast for about 6-7 minutes. Checking to make sure they are not turning too brown or burning every so often (you will know they are done when they look a little brown and smell toasted). Once they're done toasting, pull them out of the oven and let them cool for a few minutes. Once they are cooled, pulse in a food processor a few times so that they are roughly chopped. 
3. While the almonds are toasting, combine all of your dry ingredients in a bowl and mix well.
4. Wisk the Ener-G Egg Replacer powder and warm water together in a bowl until there are no lumps and the liquid is frothy.  Add the vanilla, almond, & anise extract and mix well.
5. Combine the wet ingredients with the dry and add the almonds.  Mix until a sticky and dough is formed (you may have to use your hands to kinda kneed it - you can use a little Pam or flour your hands so that it is easier to work with).
6. Once the dough is formed, line your cookie sheet with wax (parchment) paper and form the dough into a log that is about 4-5 inches wide and 8-10 inches long. 
7. Bake the dough for about 40 minutes. Pull it out of the oven and let it cool for about 10 minutes.
8. Cut the dough using a knife into 1/2 inch thick slices.  The dough will be very hard but remember, it is supposed to be crunchy. (Tip: I used a pizza cutter bc it was easier for me to cut)
9. Place the biscotti sliced side down and bake for about 15 minutes or until they are golden brown in color.
10. Pull them out of the oven and on to a cooling rack.
11. In a glass bowl, place chocolate chips in the microwave in increments of 30 seconds and stir in between for about 2 minutes until they have melted completely.  
12. Using a spoon or spatula, spread the chocolate on the bottom of the biscotti and let it finish cooling.
13. Store in an air tight container and enjoy with your favorite beverage. 


Sunday, September 23, 2012

Oreo truffles

Mmmm truffles! I got this recipe from my cousin Rupel, she made these a couple of years ago, and it is seriously one of the best no-bake desserts I have ever come across! When I found out you only needed three ingredients to make this, I was sold! You can make different variations of these too! I've made mint truffles using the cool mint creme oreos, and also peanut butter-oreo truffles with the peanut butter oreos, and both are so good! These are awesome for any occasion, anytime of the year! Thanks Rupelben! :)

Ingredients
- 8oz Oreo Cookies
- 4oz Cream cheese at room temperature
- 8oz milk chocolate (baking) chocolate

Directions
- In a food processor, crush oreos until they resemble coarse crumbs.
- Using an electric mixer mix cream cheese and oreo crumbs until fully combined, mixture will have a thick paste consitency. (if the mixture is too thick and isn't mixing, add 1 TBSP of milk).
- Refrigerate mixture in an air tight container for at least 3 hours until mixture is firm. (I let it sit overnight, as it is easier to roll)
- Using a mini ice-cream scoop or teaspoon, scoop mixture and using your palms, roll into balls. Place on parchment paper. Refrigerate for at least an hour until firm.
- Melt chocolate according to instructions. (Be sure to use baking/cooking chocolate and not regular chocolate)
- Take the oreo balls and dip into the chocolate and place on parchment paper. Let the chocolate set. Refrigerate.
- (optional) Melt 1oz white chocolate. Put melted chocolate into a ziploc bag and cut the corner of bag. Drizzle over truffles.

Serving size
- Makes approximately 2 dozen truffles

Low fat version
- substitute regular oreos for reduced fat oreos.
- substitute regular cream cheese for 1/3 reduced fat cream cheese.


Sunday, August 26, 2012

Easy Peasy Whoopie Pies!

I had one of these treats at a bake sale a few years ago and they were so good! So, I decided to make my own at home, they came out perfect! They have a slightly crisp exterior and a soft and cakey inside. The best part?! There is frosting in the middle! They're awesome for bake sales, picnics and parties. I made red velvet pies with cream cheese frosting, but any flavor is going to be just as good. I've tried carrot cake, chocolate, cinnamon and they're all delicious. I substituted most of the oil in the recipe for apple sauce so they're definitely more healthier than your average whoopie pie and they're eggless! They don't take that much time either, so if you're in a time crunch these are perfect! Bake a batch and you'll be in whoopie heaven!

Whoopie Pie Ingredients
- 1 box of red velvet cake mix (I like betty crocker)
- 1/4 cup water
- 1/2 cup unsweetened apple sauce
- 2 TBSP ener-g egg replacer
- 2 TBSP vegetable oil

Cream Cheese Frosting Ingredients
- 2 TBSP sweet cream butter- room temperature
- 4 oz. cream cheese- room temperature
- 1/4 cup confectioners sugar
- 1/2 TSP vanilla extract
- 2 TBSP whipping cream

Directions
- Preheat oven to 350.
- in a bowl combine water and ener-g egg replacer and mix with a fork or whisk until completely smooth.
- In a mixer (I used a kitchen aid, but a hand held mixer works fine too) combine oil, apple sauce and ener-g mixture and mix on low speed for one minute.
- Adding 1/3 cup at a time, add cake mix until batter in fully combined. (batter will be slightly thick)
- Line cookie sheet with parchment paper.
- Using a mini ice-cream scoop, make 1 inch balls and drop on cookie sheet and flatten slightly. If you don't have a mini ice-cream scoop- using two tablespoons. (scoop one tablespoon of batter and form a ball with the help of the other spoon and drop batter on cookie sheet, and flatten slightly)
- Bake for 10-13 minutes. (Oven times will vary, best way to check if the pies are done- insert a toothpick until it comes out clean). Cool completely
- While pies are baking, in a medium bowl add cream cheese and butter and cream together with a hand held mixer until pale and creamy. (Make sure butter and cream cheese are at completely at room temp, or frosting with be lumpy)
- Add whipping cream and vanilla extract and mix. Add sugar and mix for about 2-4 minutes until frosting is light and fluffy.
- After pies are cooled, add 1 TBSP of frosting to the flat side of the whoopie pie and put another pie on top.

Serving Size- Makes about 15 whoopie pies

Serving suggestion
- For a lower calorie filling, use cool whip.
- If you don't have time to make the frosting from scratch use whatever frosting you have on hand!


Sunday, August 19, 2012

Chocolate Chip Cheesecake

A few years ago, there was a study done which concluded that eating a few ounces of dark chocolate everyday is good for your health; well, needless to say, this was all I needed to eat chocolate on a daily basis.  Now, I usually don't eat chocolate everyday but every so often, I indulge.  Earlier this week, we celebrated my husband's birthday and his special request this year was my chocolate chip cheesecake.  He loves my cheesecake because it's not too rich but rather has a sweet taste to it with just a hint of dark chocolate.  Below is the recipe that I've perfected over the years and I hope you enjoy it as much as my family and I do:

Ingredients:
Crust:  1 & 1/2 cup crushed chocolate flavored teddy grahams
           2 TBSP unsalted butter or margarine, melted
           2 cups nestle toll house mini semi sweet chocolate morsels, divided
Filling:  1 (8 oz) packet of regular Philadelphia cream cheese (softened)
           1  (8 oz) packet of 1/3 less fat cream cheese (softened)
           1/2 cup granulated sugar
           1 TBSP vanilla extract
           3 TBSP unsweetened apple sauce
           2 TBSP non fat plain yogurt
           2 TBSP all purpose flour
           1 cup carnation evaporated milk
           1/2 cup fat free sour cream

Directions:
For the crust, crush graham crackers in a food processor and in a bowl, combine it with the melted butter until moistened.  Press onto the bottom of an ungreased 9 inch springfoam pan and sprinkle with 1 cup of the morsels.      
Preheat the oven to 300 degrees.
For the filling, beat cream cheese, sugar, & vanilla extract in large mixer bowl until smooth. Add in the remaining ingredients gradually.  Pour over crust and sprinkle with the remaining morsels. 
Bake for 30 minutes.  Loosely cover with foil and bake for another 50-55 minutes or until the edge is set but the center still moves slightly.
Place in the refrigerator over night.
Remove the side of the springfoam pan before cutting.
Hint: The cheesecake taste better on day 2!    


Sunday, August 5, 2012

Creamy Cold Coffee

We have officially reached the dog days of summer; this week, the temperature hit 107!  So when I was brain storming about what to make for this week's post, I didn't have to think too hard because I wanted something cold and refreshing.  I am a coffee lover and an avid coffee drinker but with it being so hot, I don't exactly want a hot cup of joe in the middle of the afternoon or after dinner.  Today's recipe hits that spot on these hot summer days when you need just a little pick me up. Hope you enjoy it as much as I do!

Ingredients:
1 cup of cubed ice
1/2 cup milk (I use skim but you can use whatever you have on hand)
2 TBSP sugar (can also use splenda or another sweetener)
1 tsp instant coffee or espresso powder
1/2 scoop vanilla ice cream**
Whip cream & chocolate syrup to top (optional)

Directions:
Place ice, milk, sugar in a blender and pulse/ mix for about 30 seconds
Add instant coffee & ice cream and blend for another 30- 40 seconds
Serve in a tall glass with whipped cream and drizzle chocolate syrup on top
Enjoy!
Serving Size - 1

** Ice Cream is optional; you can use also use coffee flavored or chocolate ice cream. Frozen yogurt can be used for a healthier option.


Sunday, July 1, 2012

English Scones


With the Olympics around the corner, and the Queen celebrating the diamond Jubilee, I felt it was appropriate to post a recipe from my home town- London! So, usually when most people think of food and England the first thing that comes to mind is tea, crumpets, scones and delicate sandwiches. All of these items are yummy, but English scones is one of the things that I miss over here in the States. Now English scones are different from the scones you get here in the U.S. English scones are not very sweet, usually have some dried fruit and served traditionally with jam and clotted cream (As they're not very sweet, I recommend eating the scones with a sweet and tart jam/preserve and a little butter). I used fresh blueberries in this batch, and though it tastes good, the blueberries burst in the oven and start to bleed so I would definitely stick to dried fruit! So while you're watching the London Olympics whip up a batch of these, pair with some earl grey and enjoy! :)

Recipe
1-2/3 cup of all purpose flour
1/2 TSP salt
1/3 cup sugar
2/3 cup buttermilk
2 TSP baking powder
1/2 cup your favorite dried fruit
4 TBSP cold butter cubed.

Directions
- Preheat oven to 350.
- Sift all of the dry ingredients together.
- With two forks or a pastry cutter, cut butter into flour until mixture resembles coarse crumbs.
- Add dried fruit and mix.
- Add buttermilk and mix with a wooden spoon or spatula (it should come together easily)
- Turn out dough onto a lightly floured surface, pressing lightly with your hands form a disk and saran wrap the dough. Place in fridge for at least an hour.
- After you have chilled the dough, on a lightly floured surface - roll out dough so it's 1-1/2 inch thick.
- use a cookie cutter/biscuit cutter to mold your scones, and place on a baking sheet that is lined with parchment paper.
- brush each scone lightly with milk
- Bake for about 12-14 minutes (oven times will vary) or until it is lightly browned on the top.
- Serve warm with your favorite jam!

Makes approximately 20 (2-1/2 inch) scones

Serving suggestion
- serve with your favorite jam
- Serve with butter or some sweetened fresh whipping cream.


Sunday, June 10, 2012

Caramel Turtle Ice Cream Cake

I scream, you scream, we all scream for ice cream...cake!!! Before I begin today's recipe I would like to just throw in a disclaimer by stating that I usually do not make such extravagant desserts very often because they are so rich; but, right around the time of my hubby's birthday, he likes to remind me that it has been a full year since I last made his favorite dessert - ice cream cake.  Earlier this week, we just happened to have some very special guests over and I decided to spoil them by making a caramel turtle ice cream cake for them since the temperate in Texas is already in the 90's.  Now I have to warn you that this recipe is time consuming because it requires freezing and refreezing the ice cream but the final result is well worth it!

Ingredients:
1 pack chocolate cake mix ( I prefer Betty Crocker but you can use any kind)
1 quart Bryers all natural vanilla bean ice cream
1 small container of cool whip ( I use the fat free kind but you can use any kind)
caramel syrup
chocolate syrup
pecan halves & pieces

Directions:
1. Bake cake according to directions on box. I bake mine in a 8 inch round but I don't separate it out into 2 pans. 
2. Let the cake cool over night.
3. Before you begin to build the ice cream cake, take the ice cream out for about 20-30 minutes to soften.
4. Once the ice cream has softened up, place the cake on a platter & scoop about 4-5 scoops on top.
5. Using a spatula, spread the ice cream and place in freezer.
6. Keep in the freezer for 10 minutes.
7. Repeat steps 4-6 and continue building the cake until the ice cream is the same height as the cake.
8. Once you're done building the cake, let the cake freeze for about an hour to an hour and a half.
9. At this point, you're ready to start decorating the cake.  Mix/ Whip the cool whip until it's smooth in consistency.
10. Spread the cool whip evenly on top and the sides of the cake.
11. Decorate with pecans, pecan pieces, caramel, & chocolate.  I used zip lock bags and cut a tiny hole in the bottom and created the swirls on top using those.

You can make this cake using any variation of cake and ice cream flavors.  One of the favorites in my house is chocolate cake with cookies and cream ice cream decorated with Oreo cookies.