I love breakfast foods, and one of my favorite things to make is veggie cream cheese with a bagel. This recipe is so quick, and so delicious! You can store it in your fridge for a couple of weeks too! Its also really good in sandwiches and wraps. Try it out for your next breakfast or brunch!
Ingredients
- 8 oz reduced fat cream cheese
- 1 tbsp chopped cilantro
- 1 tbsp chopped parsley
- 1 tbsp chopped tarragon
- 2 tbsp finely diced carrot
- 2 tbsp finely diced red pepper
- 1 tbsp jalapeno
- pinch of salt and pepper
Directions
- bring cream cheese to room temperature, and mix herbs and chopped veggies and salt and pepper. Mix until well incorporated.
- spread generously on a toasted bagel!

Sunday, December 30, 2012
Sunday, December 23, 2012
Sangria Mocktail
Earlier this year, my husband and I celebrated our four year wedding anniversary. Now this wouldn't be a big deal except we have a tradition that requires a lot of thought at times. Our gifts to each other has to incorporate the traditional wedding gift in our presents. For the fourth year of marriage, the traditional wedding anniversary gift is either fruit or flower. After thinking long and hard, I wanted to do something original while keeping the cost low as I didn't want to spend an arm and a leg on fruit. It just so happened that I was watching a cooking show and the host made some mock sangria. The recipe turned out so good I just had to share it with y'all!
Ingredients:
1 apple, peeled & thinly sliced
1 lemon, juiced
1 orange, juiced
1 orange, sectioned
3/4 cup cranberry-grape juice concentrate, thawed (I just bought the 2 concentrates separately and mixed them)
Tiny pinch of ground cinnamon
3 cups seltzer water
Directions:
1. In a pitcher, add apple slices, lemon juice and stir.
2. Add in the orange juice, orange sections, cranberry-grape concentrate, & cinnamon.
3. Let the mixture set for an hour (up to 12 hours) to let the flavors blend.
4. Add seltzer water right before serving.
5. Serve in glasses filled with ice.
6. Enjoy!

Sunday, December 16, 2012
Eggplant Parmesan
I hate eggplant. The only exception is this dish. The first time I had eggplant was a couple years ago at a friends house. I was in love! It doesn't taste super eggplant-y, which I love and it's really hearty so it's great when you have a big crowd. I only make this twice a year, just because it takes a little time and patience, but soo worth it! I've tried alot of different variations, I have fried the eggplant, which is messy, really time consuming and obviously really unhealthy. Then I thought why don't I bake the eggplant instead of frying it, and it worked perfectly! I usually serve it with a side of spaghetti or some kind of pasta, and it's fantastic!
Ingredients
- 2 large eggplants, peeled and cut into 1/4 in slices.
- 4 cups of your favorite pasta sauce
- 4 cup Italian blend cheese
- 2 cup plain bread crumbs
- 1 cup chickpea flour mixed with 1 cup water
- 1 TSP dried oregano
- 1 TSP crushed red pepper
- 1 TSP salt plus salt for sprinkling.
- 3 TBSP fresh basil chopped
- 2 TBSP fresh Italian parsley chopped
- non stick spray
Directions
- Place eggplant slices on baking tray, making sure that they're not overlapping. Lightly sprinkle salt over eggplant slices, flip slices over and lightly sprinkle salt on that side also. Wait 20-30 minutes. (After 30 minutes you'll notice that the salt draws some of the bitter liquid from the eggplant)
- Rinse Eggplant slices thoroughly and drain in a colander.
- Preheat oven to 375
- Mix chickpea flour and water thoroughly, making sure there are no lumps. Pour through a sieve if necessary. Batter should have a buttermilk/thick milk consistency. Pour in a bowl and set aside.
- Mix breadcrumbs, TSP salt, oregano, crushed red pepper and set in a bowl.
- Dip eggplant slice in chickpea flour mixture then directly into the breadcrumb mixture. Make sure eggplant slice is thoroughly covered with breadcrumbs, set on baking tray that has been sprayed with non stick. Repeat with remaining eggplant slices.
- Place breaded eggplant slices in oven for about 25-30 minutes. After 15 minutes of baking, flip slices so they brown evenly.
- Cool the cooked slices for a few minutes.
- Pour one cup pasta sauce on the bottom of a casserole/lasagna dish.Then layer the eggplant slices, top with another cup of sauce and top with a cup of cheese and one TBSP fresh basil. Repeat layers (Top layer should have 2 cup cheese). You should have about 3 layers. Sprinkle fresh chopped parsely ontop.
- Bake in the oven at 350 for about 20-30 minutes or until the cheese is hot and bubbly ontop and corners are browning slightly. Cool about 5 minutes before serving.

Sunday, December 9, 2012
Deep Dish Pizza
Earlier this week, I asked my husband what he wanted for dinner (as I always do) and his response came as a complete surprise to me. He responded with a, "deep dish pizza" as if I were some sort of a magician that can just whip it up by snapping my fingers. But, I definitely wanted to make it for him because he never really asks for much (and because I would like to think I'm a good wife). With that in mind, my mission this week was a find a quick and easy way to make deep dish pizza. Here's my quick and easy recipe for a homemade deep dish pizza.
Ingredients:
1 box of Auntie Annie's at home baking kit (I found this at Sam's Club)
1 tsp Italian seasoning
1 tsp crushed red pepper
2-3 TBSP flax seed meal
Pizza sauce
Your favorite toppings (I used green & black olives, red bell peppers, & mushrooms)
Directions:
1. Follow the directions in the kit to make the pizza dough. But add 1 tsp crushed red pepper, 1 tsp Italian seasoning, 2-3 TBSP flax seed meal to the dry ingredients before mixing it with the wet ingredients.
2. Spray a 9 inch pizza pan with Pam or another non stick cooking spray.
3. Take 1/2 of the risen dough, roll it into a ball, & place it in the middle of the cake pan.
4. Start spreading and stretching the dough so that it covers the entire pan and continue to stretch it so that it goes up the sides of it.
5. Spread a little pizza sauce on top of the dough. Also brush it along the sides of it as well.
6. Place your toppings on top of the sauce, top with some cheese, add more toppings, and finish off with some additional cheese.
7. In a preheated oven, bake at 400 degrees for 25 minutes or until the bottom is brown and the cheese is bubbling.
Enjoy!!!

Sunday, December 2, 2012
Gingerbread Men!
Tis' the season to be jolly! The holidays are here and so much fun, and I wanted to share one of my favorite holiday cookie recipes with y'all! These are fun to make, decorate and eat! They're great if you have children coming over, get them to decorate these treats, they'll stay out of trouble and you'll have once less recipe step to complete! I love the combination of cinnamon and ginger, with a touch of white chocolate.. SO good!
Ingredients
- 1 stick of unsalted butter at room temperature
- 1/2 cup firmly packed light brown sugar
- 1/2 cup golden syrup
- 2 TBSP ener-g egg replacer + 1/4 cup water mixed thoroughly
- 2-1/4 cups plain flour
- Extra flour for rolling out
- 1 TSP ground cinnamon
- 1 TSP ground ginger
- 1 TSP baking soda
- 4 oz White chocolate
- sprinkles/chocolate chips/icing pens
Directions
- Preheat oven to 350. Line two baking sheets with parchment paper that have been lightly sprayed with cooking spray.
- Using a mixer or handheld mixer, beat butter and sugar in a bowl until pale and creamy, then add the golden syrup and egg replacer mixture and beat until combined.
- Slowly stir in the flour, ginger, cinnamon and baking soda.
- Turn onto a lightly floured surface and knead softly until smooth. Press dough into a disc and cover with plastic wrap and place in the fridge for 30 minutes-1 hour to rest.
- Turn dough out on a clean, dry surface that has been floured, then roll out until about 1/4 inch thick. Use a gingerbread man cutter to cut out shapes. Place on trays about 1 inch apart. Keep repeating with any excess dough
- Bake in oven for about 10-12 minutes or until cookies start to brown. Remove from oven. Transfer to a rack to cool.
- Melt white chocolate in a microwave safe bowl for 30 seconds. Transfer to a ziploc bag and cut a small corner of the bag. Pipe eyes, mouth and buttons onto the gingerbread men, and decorate however you want!

Tips
- if dough is too sticky add flour TBSP at a time until dough is soft but doesn't stick to hands or surface.
- when rolling out the dough, flour rolling pin and cookie cutter to prevent sticking.
- if you don't have gingerbread cookie cutters, then use any cutter you want or use the mouth of a drinking glass (dip the mouth in flour to prevent sticking)
- if you don't use all the dough, you can refrigerate for up to a week in an airtight container, or freeze for a month.
- You can find golden syrup in most grocery stores, usually in the British aisle. I use Lyles golden syrup. If you can not find it, a substitute for this can be found on this website : http://www.foodsubs.com/Syrups.html

Serving size
- makes about 3 dozen gingerbread men.
Sunday, November 25, 2012
Easy Veggie Chili
Fall is my absolute favorite time of the year because of so many reasons. The leaves change colors, everyone is in a great mood because the holidays are around the corner, and of course the weather is perfect...which leads me to the other reason why I love the fall; it's the perfect time of the year for soups and stews. Usually the weather is just nippy enough this time of the year for me to enjoy a nice big hearty bowl of chili. My recipe for chili is not only easy but it's pretty quick so you can fix a bowl (or two) after work without spending hours in the kitchen. Try it for yourself and let me know what you think!
Ingredients:
1 TBSP EVOO
1 red bell pepper, diced
1 green bell pepper, diced
5-6 Baby carrots, diced
1 stalk of celery, diced
1- 6 oz can of V8 (I use the Hot & Spicy kind)
1 - 28 oz can of diced tomatoes
1/2-1 cup water
3 cans of your favorite beans (I use black, dark red kidney, & pinto)
2 TBSP cayenne pepper
2 TBSP ground cumin
2 dried Adobo chilies
Salt to taste
Hand full of fresh cilantro
Dallop of sour cream (I use fat free)
Corn (optional)
Directions:
1. Drain and rinse the beans
2. Heat oil over low to medium heat in a non stick pot
3. Once the oil is heated (about a minute or two), add bell peppers, carrots, celery and cook until the peppers are bright in color and the celery is translucent (about 3-5 minutes)
4. Add the can of diced tomatoes, V8, and water
5. Add cumin, cayenne pepper, salt, & beans
6. In a separate pot, place about 2 cups of water to boil and put the adobo chili peppers in there to rehydrate. Once the water starts to boil and the peppers have plumped up, place them in a blender or mini food processor, add about a 1/4 of a cup of the boiling water, and blend.
7. Put the blended up adobo chili peppers in the chili to give it a great smokey flavor.
8. Bring the chili to a boil, reduce the heat, and let it simmer for about 30-40 minutes. If the chili is too thick, add more V8. If the chili is too runny, let it simmer longer.
9. Serve in a bowl with cheese on top, sour cream, & fresh cilantro.
10. You can add veggie protein crumbles if you want extra protein.
11. Enjoy!
There are so many ways to enjoy this chili but my hubby & his friends love to eat it on top of corn chips for a delish chili frito pie. I love it on top of a baked potato or by itself with croutons on top. This dish is even better the next day once the flavors have settled!

Monday, November 19, 2012
Creamy mashed potatoes
With Thanksgiving around the corner I thought it would be appropriate to post this recipe in honor of the holiday! Obviously at my dinner table there isn't a turkey, but we usually do like a savory pie or a tofu dish. Last year we didn't have a main meal but we had a bunch of sides like mac and cheese, mashed potatoes, grilled mushrooms and asparagus, dinner rolls, roasted butternut squash and peppers. It was awesome! So I thought a staple dish for this holiday is definitely mashed potatoes, and one of my family's favorites! It's creamy, rich and yummy! So this holiday whip some up and serve it at your table with your family and friends!
Ingredients
- 3lb Yukon gold potatoes
- 4 TBSP butter at room temperature
- 1/3 cup fat free half and half
- 4 oz reduced fat cream cheese at room temperature.
- Salt and pepper
- Fresh parsley- chopped
Directions
-Peel and cut potatoes in big chunks (try get them to be the same size)
- Fill a large pot with cold water, add potatoes to the pot. Bring to a boil on high heat about cook potatoes 25-30 minutes. They're done when you stick a knife in the potato and the potato slides off the knife easily.
- Drain potatoes. If you have a potato ricer, mash potatoes through the ricer. Or mash potatoes with a masher.
- Add butter, half and half and cream cheese and mix until everything is well incorporated. Season with salt and pepper. Garnish with fresh parsley. Serve hot!
Serves 4-6
- If potatoes look dry and not creamy enough, add 1 TBSP half and half at a time til you reach desired consistency.


Tuesday, November 13, 2012
Happy Diwali & New Year!!!
Diwali is known as the festival of lights and symbolizes the triumph of good over evil and light over dark. It is a celebration that is split up into 2 days; Diwali itself is like New Years Eve followed by the New Year the next day. This is the time for friends and family to come together and celebrate in unity as we say farewell to the old year and welcome the new. On this auspicious occasion, Krishma and I wish you and your family a very Happy Diwali and a prosperous New Year!!!


Sunday, November 11, 2012
Cucumber Mint Tea Sandwiches
I absolutely love mint and anything that has anything to do with mint! This includes girls scout Thin Mints cookies, mint chocolate chip ice cream, mint fudge...you get the point. So this recipe is near and dear to me bc it contains one of my favorite ingredients. I've made these little sandwiches for all sorts of get togethers and they have been a hit every time. With the holidays right around the corner, try making these at your next gathering and I promise your guests won't be let down!
Ingredients:
1/2 pack of whole grain or white bread
salted butter - room temperature
1 English cucumber peeled and thinly sliced
2 TBSP + a little more of Salt
10-12 fresh mint leaves
Pepper to taste
Directions:
1. Peel the cucumber and slice them thinly at an angle (diagonally).
2. In a separate container, mix the cucumber slices and 2 TBSP of salt and let it sit there for 10-15 minutes. (Here's a little trick I use, I put the cucumber slices in the container, add the salt, cover the container and shake it so that I don't have to mix anything)
3. In the mean while, using a mini food processor or coffee grinder, grind the mint leaves.
4. Once the cucumbers are done, squeeze out all the water that was released, and place the cucumbers on a paper towel and wipe them dry and take off the access salt.
5. Spread butter on a slice of bread, place cucumbers on top, spread a bit of the ground up mint, sprinkle some salt and pepper, and top with another buttered slice of bread.
6. Cut off the edges of the bread and cut the sandwich diagonally so that it forms into 4 triangular pieces. (Because I hate to waste food, I use the discarded edges to make croutons at home - if you want that recipe, leave a comment on this page and I'll put it up for you)
Enjoy with tea, coffee, or your favorite beverage!

Sunday, November 4, 2012
Caramel Apples!
I've been wanting to make these for a really long time, they're too good! I was planning to make the caramel from scratch but heard all these horror stories about it...sooo I decided against it, especially since it was my first time making this. Instead I found a really great short cut, using soft caramel candy! It worked! It took me less then 20 minutes to make! It was so easy! I did a coat of chocolate (this obviously takes a little more time) on top of the caramel covered apple for some extra yum, but if you don't want to then that's totally fine!
Caution- using caramel candy for making caramel can still be dangerous so please use gloves when handling the bowl and keep little children away while making this!
Ingredients
1 cup unwrapped soft caramel candy
1 tbsp milk
2 medium sized granny smith apples/3 small granny smith apples
1/2 cup whichever chocolate chips you fancy!
popsicle sticks
Directions
- in a microwave safe bowl combine caramel candy and milk and microwave for 1 minute 30 seconds. Stirring once after a minute. (if caramel isn't completely melted, microwave for additional ten seconds)
- skewer the washed apple with a Popsicle stick and dip into the caramel until apple is coated. Let stand over the bowl for about 10 seconds so extra caramel drips off.
- set apple on a tray lined with aluminum foil that's been greased with non stick spray. Let the apples set in a cool dry place. (They don't take long to set about 20-30 minutes)
- if coating with chocolate. Melt chocolate in microwave safe bowl and after apple has been cooled and has set, dip into chocolate, place apple back on foil and refrigerate until chocolate is firm.
- cut the apple right before serving, or apple will start to brown and oxidize.

Sunday, October 28, 2012
We're All Mad Here Tea Party!
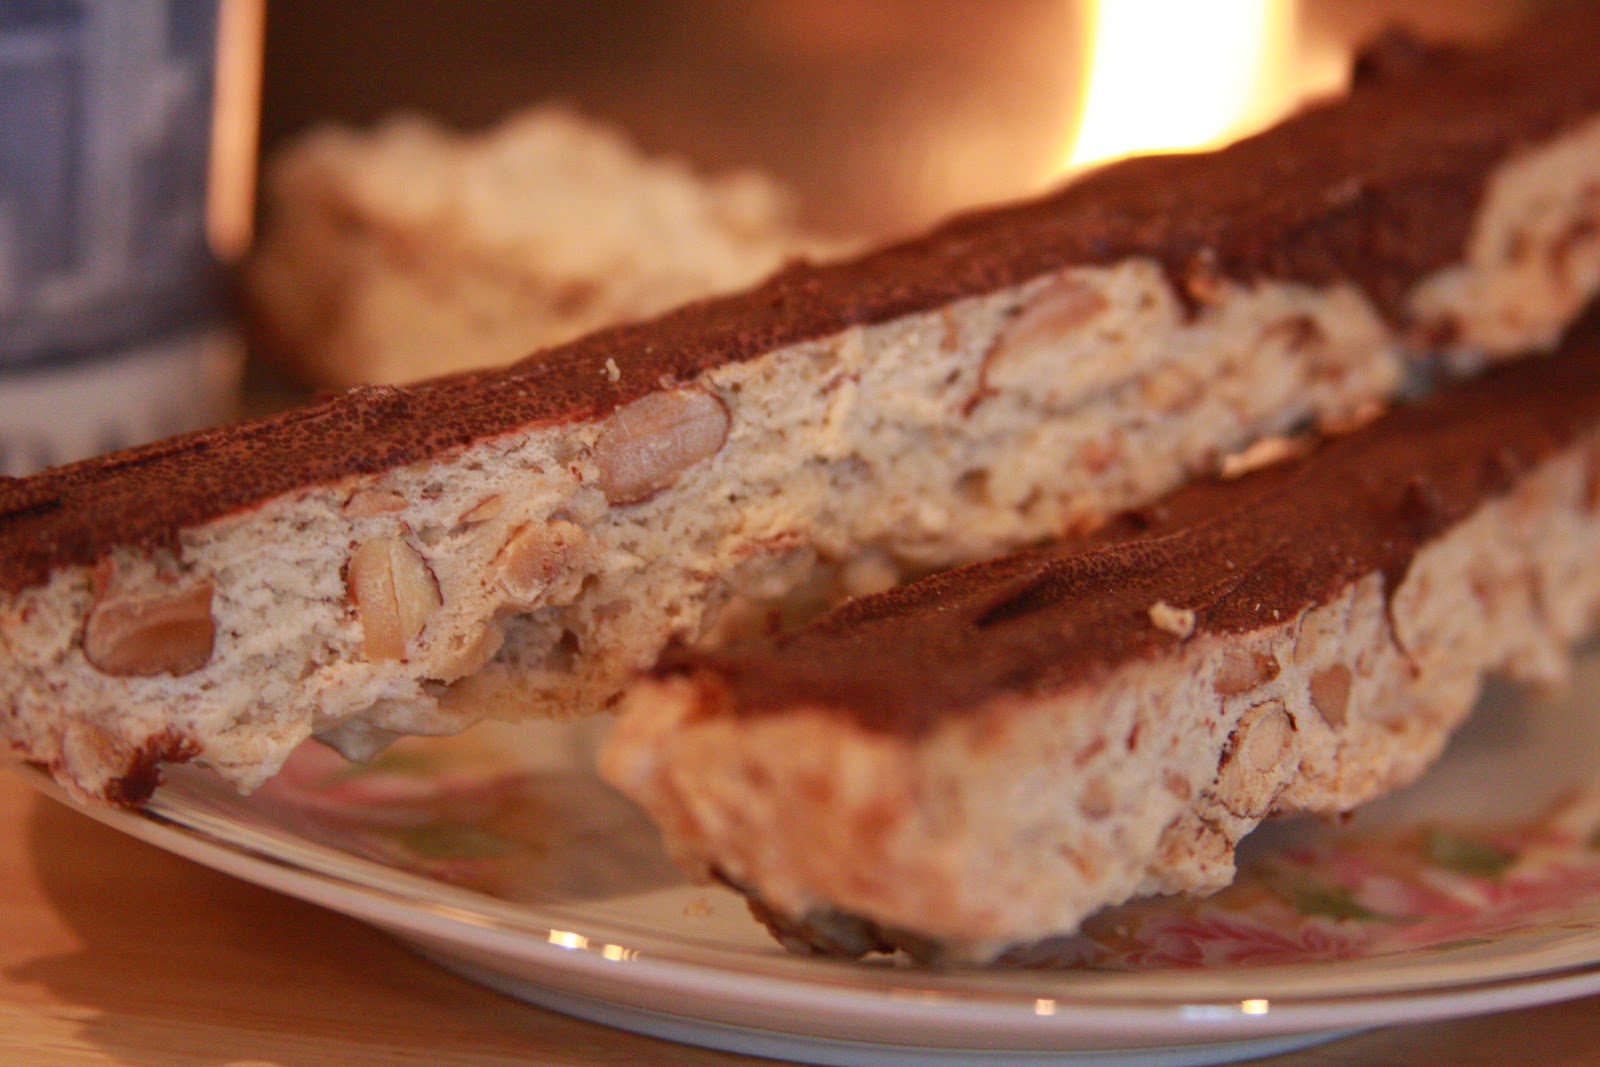
Yesterday was a fun filled day for my sister and all of our friends! Since my sister is getting married in less than two months, I thought it would be appropriate to throw her a bridal shower. With the help of some wonderful ladies as well as one Glenda Bryant, the event coordinator, I came up with the idea of a tea party. BUT, I didn't just want it to be any old tea party, if we were going to go out, I figured, why not go ALL out!!! With that thought in mind, I decided to go with the Mad Hatters Tea Party theme from...Alice in Wonderland. Now the idea of the Mad Hatters Tea Party includes out of the ordinary elements such as mismatched china, non traditional centerpieces, fabulous finger foods, all while keeping the tea party classy. Invitations gave guest a hint of what was to come by placing the words "We're All MAD Here" at the top of them followed by the party and venue details. The food was all prepared from scratch by Krishma, myself, and our great friends Anna, & Ami. To continue with the theme, food and beverage tags were made as well as party favor bags which consisted of a small jar of honey, a honey dipper, various flavored teas, and home made biscotti (see the Almond Biscotti post for recipe). Below are some pictures from the party that I wanted to share with y'all.


Beverages included a Pineapple & Guava Punch, Assorted teas, & Refreshing lemon & mint water
 Table settings included china & various style tea pots


And below are some candid shots of guests enjoying themselves.


And finally a group picture of the girls with the bride to be.


 |
| The Tea Menu |

The food display


Beverages included a Pineapple & Guava Punch, Assorted teas, & Refreshing lemon & mint water


 |
| Gift table with party favors |

And below are some candid shots of guests enjoying themselves.


Almond Biscotti
I am not sure if I've told this little bit of information about myself with you guys but one of my favorite things in the world is coffee (and more recently tea)! I simply CANNOT live without that caffeine intake every morning and trust me when I tell you, I have tried. Anyway, one of the things I love to dip in my coffee or tea is biscotti. Biscotti just puts me in a good mood for some reason and let's just be honest, who isn't happy eating a cookie dipped in their favorite beverage?! I had been looking for a recipe for a while and stumbled across a few but never made it. But this week I decided to be brave and make this yummy treat at home to see if I could come up with a great egg free recipe to share with y'all (there are lots of recipes out there and this is one that combined ingredients from several of them).
Before I dive into the recipe, I will warn you of a couple of things...1. this recipe is somewhat time consuming but the end result is worth the time spent; & 2, I baked this 3 times but the batch turned out a bit more crunchy than I was hoping so I would recommend baking it twice instead of the 3 times if you're wanting something a little less crunchy.

Before I dive into the recipe, I will warn you of a couple of things...1. this recipe is somewhat time consuming but the end result is worth the time spent; & 2, I baked this 3 times but the batch turned out a bit more crunchy than I was hoping so I would recommend baking it twice instead of the 3 times if you're wanting something a little less crunchy.
Ingredients:
2 cups all purpose flour (you can also use wheat pastry flour)
1 tsp baking powder
1 cup sugar
Dash of salt
1 tsp pure vanilla extract
1 tsp almond extract
1 tsp anise extract
1 cup raw almonds, toasted
7 & 1/2 tsp Ener-G Egg Replacer powder
10 TBSP of warm water
1/2 cup semi sweet or milk chocolate chips
Directions:
1. Preheat oven to 300 degrees.
2. Place your almonds on a baking sheet to toast for about 6-7 minutes. Checking to make sure they are not turning too brown or burning every so often (you will know they are done when they look a little brown and smell toasted). Once they're done toasting, pull them out of the oven and let them cool for a few minutes. Once they are cooled, pulse in a food processor a few times so that they are roughly chopped.
3. While the almonds are toasting, combine all of your dry ingredients in a bowl and mix well.
4. Wisk the Ener-G Egg Replacer powder and warm water together in a bowl until there are no lumps and the liquid is frothy. Add the vanilla, almond, & anise extract and mix well.
5. Combine the wet ingredients with the dry and add the almonds. Mix until a sticky and dough is formed (you may have to use your hands to kinda kneed it - you can use a little Pam or flour your hands so that it is easier to work with).
6. Once the dough is formed, line your cookie sheet with wax (parchment) paper and form the dough into a log that is about 4-5 inches wide and 8-10 inches long.
7. Bake the dough for about 40 minutes. Pull it out of the oven and let it cool for about 10 minutes.
8. Cut the dough using a knife into 1/2 inch thick slices. The dough will be very hard but remember, it is supposed to be crunchy. (Tip: I used a pizza cutter bc it was easier for me to cut)
9. Place the biscotti sliced side down and bake for about 15 minutes or until they are golden brown in color.
10. Pull them out of the oven and on to a cooling rack.
11. In a glass bowl, place chocolate chips in the microwave in increments of 30 seconds and stir in between for about 2 minutes until they have melted completely.
12. Using a spoon or spatula, spread the chocolate on the bottom of the biscotti and let it finish cooling.
13. Store in an air tight container and enjoy with your favorite beverage.
Sunday, October 21, 2012
Tomato Basil Soup
This is one of my favorite soups! It's good all year around and most of the ingredients you have right in your pantry! This is best served with some really yummy french bread, and some salad! I take this for lunch when I'm on the go and it's perfect! Flavor it to your taste with extra crushed red pepper and you're good to go!

Ingredients
- 2 TBSP butter
- 1- 28oz can cento san marzano whole peeled tomatoes
- 2 cups fresh chopped tomatoes
- 2 cups tomato juice
- 1/3 cup fresh basil
- 1/3 cup half and half
- 1/4 TSP red crushed pepper
- salt and pepper to taste
Directions
- In a large sauce pan combine whole peeled tomatoes, tomato juice and the fresh chopped tomatoes. Bring to a boil and let simmer for about 15 minutes.
- In a food processor blend the contents in the sauce pan along with the basil.
- Return the blended tomatoes to the sauce pan and let simmer.
- Add half and half, butter and rest of the seasonings.
- Serve hot with fresh bread.
Serving size- 4
Tips
- If soup is too runny, let simmer longer until you reach a thicker consistency. If soup is too thick, add a little water at a time until you reach the right consistency.

Sunday, October 14, 2012
Oooey Gooey Oatmeal
I absolutely LOVE breakfast and breakfast foods! This includes all carbs - biscuits, pancakes, cereal, toast & every other carb available; but, one of my all time breakfast favorites is oatmeal made with all the fixin's. My recipe for oatmeal is not only good for you but it's also quick, easy, & absolutely delish! Try it at home (or work) and let me know what you think.
Ingredients:
1/2 cup cooking oats
1 cup skim milk
roughly 2 TBSP of brown sugar
2 TBSP coconut flakes
2 TBSP chopped walnuts
Dash of cinnamon
A few dried cranberries
Directions:
1. Heat milk on a stove top on medium to low heat until it comes to a boil.
2. Add quick cooking oats and cook for 2 minutes until the mixture starts to thicken.
3. Add brown sugar, coconut flakes, cinnamon, and walnuts.
4. Place in a bowl and mix in cranberries.
5. Enjoy!
 Tip: You can substitute these toppings with any of your favorite toppings and fruit. I typically mix 1/2 cup of oatmeal with brown sugar and coconut flakes and keep them at my desk so that I can whip up a batch at any given moment. =)
Ingredients:
1/2 cup cooking oats
1 cup skim milk
roughly 2 TBSP of brown sugar
2 TBSP coconut flakes
2 TBSP chopped walnuts
Dash of cinnamon
A few dried cranberries
Directions:
1. Heat milk on a stove top on medium to low heat until it comes to a boil.
2. Add quick cooking oats and cook for 2 minutes until the mixture starts to thicken.
3. Add brown sugar, coconut flakes, cinnamon, and walnuts.
4. Place in a bowl and mix in cranberries.
5. Enjoy!

Sunday, October 7, 2012
Pumpkin Spice Latte
Fall is officially here! It is, without a doubt my favorite season and time of year! The leaves are changing colors, football is back, thanksgiving is coming up and Halloween is just around the corner! So what better way to kick this season off than with a yummy latte, featuring Autumns most popular fruit- pumpkin! It's so easy to make and the pumpkin makes this drink so good!
Ingredients
- 1 1/4 cup milk
- 2 TBSP canned pumpkin puree
- 1/2 TSP vanilla extract
- 1/2 TSP Pumpkin pie spice
- 1 TSP instant coffee/shot of espresso
- whipped cream/cool whip
- 1-2 TSP sugar (depending how sweet you like it)
Directions
- in a small sauce pan gently heat pumpkin, vanilla, sugar and spices, stirring occasionally. Heat for 2-3 Minutes.
- Pour milk in and mix until milk is fully combined with pumpkin mixture. Bring to a boil.
- Have espresso shot or instant coffee ready in a mug. Strain milk with a sieve straight into the mug and stir.
- Top with whipped cream and cinnamon.
Serving suggestions
- This makes a great cold drink. Follow all the steps and cool latte slightly and pour over ice!
Substitutions
- If you don't have pumpkin pie spice use:
- 1/2 TSP ground cinnamon
- pinch of ginger
- pinch of nutmeg
- pinch of allspice
Sunday, September 30, 2012
Arugula Pesto Panini
Yesterday, my book club met at one of my favorite little cafe's in town. I love this place because it quaint, cozy, intimate, and just a great place to meet friends, enjoy some coffee, and of course, discuss a good book - especially on a rainy day like yesterday. Anyway, they serve this AHH-MAZING sandwich that I just had to make at home because it was too good to not share with y'all. Here is my version this cafe inspired favorite!

Ingredients:
2 Slices of your favorite bread
Cream Cheese (I used 1/3 less fat)
Avocado slices from 1/2 of an avocado
Spinach
Arugula Pesto
Salt & pepper to taste
Cooking Spray (I use Pam with Olive Oil)
Directions:
1. For the arugula pesto, I made a pesto sauce using a basic pesto recipe (see Krishma's Pesto Recipe) and replaced 1/2 of the basil with organic arugula (so if your pesto recipe calls for 2 cups of basil, use 1 cup basil and 1 cup arugula) to give it a nice sharp taste.
2. On a multi grain bread, spread cream cheese on one piece of bread and the pesto on the other piece of the bread.
3. Place the two pieces of bread together and put them in a panini maker that you have sprayed with some cooking spray.
4. Once your bread has toasted and you've got the nice grill marks on there, pull it out of the panini maker and let it cool for a few minutes.
5. Open the sandwich and place more cream cheese and/or pesto on the inside if needed.
6. Place sliced avocado and a little salt & pepper on one side of the sandwich.
7. Finish off with some spinach, place your second piece of bread on top, & enjoy!
Note, typically a panini is made on Italian white bread but as you know, I like to make things as healthy as possible, so I switched it up and made it on a multi grain bread instead.

Sunday, September 23, 2012
Oreo truffles
Mmmm truffles! I got this recipe from my cousin Rupel, she made these a couple of years ago, and it is seriously one of the best no-bake desserts I have ever come across! When I found out you only needed three ingredients to make this, I was sold! You can make different variations of these too! I've made mint truffles using the cool mint creme oreos, and also peanut butter-oreo truffles with the peanut butter oreos, and both are so good! These are awesome for any occasion, anytime of the year! Thanks Rupelben! :)

Ingredients
- 8oz Oreo Cookies
- 4oz Cream cheese at room temperature
- 8oz milk chocolate (baking) chocolate
Directions
- In a food processor, crush oreos until they resemble coarse crumbs.
- Using an electric mixer mix cream cheese and oreo crumbs until fully combined, mixture will have a thick paste consitency. (if the mixture is too thick and isn't mixing, add 1 TBSP of milk).
- Refrigerate mixture in an air tight container for at least 3 hours until mixture is firm. (I let it sit overnight, as it is easier to roll)
- Using a mini ice-cream scoop or teaspoon, scoop mixture and using your palms, roll into balls. Place on parchment paper. Refrigerate for at least an hour until firm.
- Melt chocolate according to instructions. (Be sure to use baking/cooking chocolate and not regular chocolate)
- Take the oreo balls and dip into the chocolate and place on parchment paper. Let the chocolate set. Refrigerate.
- (optional) Melt 1oz white chocolate. Put melted chocolate into a ziploc bag and cut the corner of bag. Drizzle over truffles.
Serving size
- Makes approximately 2 dozen truffles
Low fat version
- substitute regular oreos for reduced fat oreos.
- substitute regular cream cheese for 1/3 reduced fat cream cheese.

Sunday, September 16, 2012
Chole (Garbanzo bean medley)
This week I'm visiting my parents, who live in Little Rock, Arkansas; I got the chance to visit and some nice QT with them so I decided to take advantage of it. One of the things that typically takes place every time I go home is that my mom takes over all of the cooking duties and I get to help clean. But this weekend, I wanted her expertise in some good ole fashioned Indian meals so I convinced her to let me cook. For today's recipe, I decided to make Chloe, which is chick peas cooked in a tomato based sauce. Hope you enjoy it as much as I do!

Ingredients:
1 can chick peas (15 oz can)
1/2 can tomato sauce ( about 8 oz)
1 TBSP EVOO (extra virgin olive oil)
1 TBSP crushed jalapeno
1 tsp chole/ chana masala (found at the local Indian store)
1/2 tsp garam masala
1/2 tsp sugar
1 bay leaf
One roma tomato diced
Salt to taste
Cilantro to garnish
Cilantro to garnish
Directions:
Heat oil on a medium to medium to low heat.
Add crushed jalapeño, bay leaf, and tomato and saute for a minute or two.
Add tomato sauce and the remaining spices.
Add chick peas and cook for about 15 minutes.
Enjoy with naan, wheat tortillas, or rice.

Monday, September 10, 2012
Cucumber and Feta rolls
Greetings from London! I'm here for my cousins wedding, and it's been a blast so far! My cousin Alpa held a tea party a few days ago, and there was so much delicious food! Different pastries, scones, sandwiches and finger foods! My absolute favorite were the cucumber and feta rolls. You start with thin slices of cucumber and inside is a yummy filling of feta, cream cheese and red pepper. They are super simple and really quick and easy to make! Try these at your next party and they will be sure to impress!
Ingredients
- 1 large cucumber cut lengthways
- 1/4 cup feta cheese
- 1/3 cup cream cheese
- 1/4 cup small diced red pepper
- 1/2 TSp red crushed pepper
- 1 TSP chopped fresh oregano
- salt and pepper to taste
Directions
- Using a cheese slicer or mandolin ( I used a cheese slicer) slice long cuts of cucumber (the layers will be about 3mm-4mm thick), and lay on a few paper napkins to drain excess water.
- In a bowl mix cheeses and all other ingredients together. Once everything is mixed, taste for salt and pepper. (Depending on what kind of feta cheese you use the saltiness will vary)
- Take one layer of cucumber and starting at one end place about a tablespoon of feta mixture and roll tightly.
- After rolling insert a toothpick in the center of the cucumber to hold in place.
- Repeat until all cucumber layers are rolled up.
Serving size
- 1 large cucumber can give you anywhere from 14-18 cucumber rolls. (This also depends on the size of cucumber)
Quick Tip!
- Make these ahead of time and keep in the fridge, just take it out when it's ready to serve!

Monday, September 3, 2012
Happy Labor Day
Happy Labor Day everyone!!! I'm so excited to be home today enjoying an extended weekend; wouldn't it be nice to have a 3 day weekend every weekend? My plans today consisted of waking up later than usual, enjoying yoga with a friend first thing this am, and now getting ready to work (boo!) but at least I'll be working from home. =) The hubby & I have a little date night tonight so I'm def. looking fwd to that. What are your plans for today?
Sunday, September 2, 2012
Southwestern Quinoa
Sometime last year I discovered quinoa and how yummy and versatile it is. Quinoa is actually a grain like crop that is grown for its edible seeds; it is high in protein and low in fat. The possibilities with quinoa are endless and once you learn how easy it is to cook, you won't want to stop experimenting. Today's recipe is for a southwestern style quinoa that can be used in a grilled stuffed burrito or just by itself.
Ingredients:
1 cup quinoa (washed and drained)
2 cups water
1 TBSP + 1/2 tsp EVOO (extra virgin olive oil)
1 can of black beans (washed and drained)
1/2-3/4 of a roma tomato, diced
1/4 cup bell peppers, diced
1/4 cup mushrooms, sliced
1 TBSP plus a dash more of Cholula hot sauce
2 pinches or a little less than 1/4 tsp Mexican oregano
Salt & Pepper to taste
2 TBSP cilantro for garnish
Directions:
In a pan, bring water and quinoa to a boil.
Once it starts boiling, reduce the heat, cover the pan, and simmer until all of the water has evaporated.
In a separate pan, heat the olive oil and sautee mushrooms & tomatoes. Cook for about 2 minutes and add bell peppers. Cook for another 2 minutes until the water released from the tomatoes has burned off.
Add salt, pepper, oregano, hot sauce, and black beans. Cook for about 4-5 minutes.
Stir in quinoa and cook for another 3-4 minutes.
Sprinkle cilantro on top & enjoy!!!
Serving size: 4-6

Sunday, August 26, 2012
Easy Peasy Whoopie Pies!
I had one of these treats at a bake sale a few years ago and they were so good! So, I decided to make my own at home, they came out perfect! They have a slightly crisp exterior and a soft and cakey inside. The best part?! There is frosting in the middle! They're awesome for bake sales, picnics and parties. I made red velvet pies with cream cheese frosting, but any flavor is going to be just as good. I've tried carrot cake, chocolate, cinnamon and they're all delicious. I substituted most of the oil in the recipe for apple sauce so they're definitely more healthier than your average whoopie pie and they're eggless! They don't take that much time either, so if you're in a time crunch these are perfect! Bake a batch and you'll be in whoopie heaven!
Whoopie Pie Ingredients
- 1 box of red velvet cake mix (I like betty crocker)
- 1/4 cup water
- 1/2 cup unsweetened apple sauce
- 2 TBSP ener-g egg replacer
- 2 TBSP vegetable oil
Cream Cheese Frosting Ingredients
- 2 TBSP sweet cream butter- room temperature
- 4 oz. cream cheese- room temperature
- 1/4 cup confectioners sugar
- 1/2 TSP vanilla extract
- 2 TBSP whipping cream
Directions
- Preheat oven to 350.
- in a bowl combine water and ener-g egg replacer and mix with a fork or whisk until completely smooth.
- In a mixer (I used a kitchen aid, but a hand held mixer works fine too) combine oil, apple sauce and ener-g mixture and mix on low speed for one minute.
- Adding 1/3 cup at a time, add cake mix until batter in fully combined. (batter will be slightly thick)
- Line cookie sheet with parchment paper.
- Using a mini ice-cream scoop, make 1 inch balls and drop on cookie sheet and flatten slightly. If you don't have a mini ice-cream scoop- using two tablespoons. (scoop one tablespoon of batter and form a ball with the help of the other spoon and drop batter on cookie sheet, and flatten slightly)
- Bake for 10-13 minutes. (Oven times will vary, best way to check if the pies are done- insert a toothpick until it comes out clean). Cool completely
- While pies are baking, in a medium bowl add cream cheese and butter and cream together with a hand held mixer until pale and creamy. (Make sure butter and cream cheese are at completely at room temp, or frosting with be lumpy)
- Add whipping cream and vanilla extract and mix. Add sugar and mix for about 2-4 minutes until frosting is light and fluffy.
- After pies are cooled, add 1 TBSP of frosting to the flat side of the whoopie pie and put another pie on top.
Serving Size- Makes about 15 whoopie pies
Serving suggestion
- For a lower calorie filling, use cool whip.
- If you don't have time to make the frosting from scratch use whatever frosting you have on hand!

Sunday, August 19, 2012
Chocolate Chip Cheesecake
A few years ago, there was a study done which concluded that eating a few ounces of dark chocolate everyday is good for your health; well, needless to say, this was all I needed to eat chocolate on a daily basis. Now, I usually don't eat chocolate everyday but every so often, I indulge. Earlier this week, we celebrated my husband's birthday and his special request this year was my chocolate chip cheesecake. He loves my cheesecake because it's not too rich but rather has a sweet taste to it with just a hint of dark chocolate. Below is the recipe that I've perfected over the years and I hope you enjoy it as much as my family and I do:
Ingredients:
Crust: 1 & 1/2 cup crushed chocolate flavored teddy grahams
2 TBSP unsalted butter or margarine, melted
2 cups nestle toll house mini semi sweet chocolate morsels, divided
Filling: 1 (8 oz) packet of regular Philadelphia cream cheese (softened)
1 (8 oz) packet of 1/3 less fat cream cheese (softened)
1/2 cup granulated sugar
1 TBSP vanilla extract
3 TBSP unsweetened apple sauce
2 TBSP non fat plain yogurt
2 TBSP all purpose flour
1 cup carnation evaporated milk
1/2 cup fat free sour cream
Directions:
For the crust, crush graham crackers in a food processor and in a bowl, combine it with the melted butter until moistened. Press onto the bottom of an ungreased 9 inch springfoam pan and sprinkle with 1 cup of the morsels.
Preheat the oven to 300 degrees.
For the filling, beat cream cheese, sugar, & vanilla extract in large mixer bowl until smooth. Add in the remaining ingredients gradually. Pour over crust and sprinkle with the remaining morsels.
Bake for 30 minutes. Loosely cover with foil and bake for another 50-55 minutes or until the edge is set but the center still moves slightly.
Place in the refrigerator over night.
Remove the side of the springfoam pan before cutting.
Hint: The cheesecake taste better on day 2!

Sunday, August 12, 2012
Basil Pesto
I love Italian food. What makes Italian food so good?! The different sauces they use. This is one of my favorite sauces- basil pesto! Although the sauce itself has only 5 ingredients (which I love!), each ingredient brings something special to the recipe. The basil is super fragrant and fresh, the parmesan gives the sauce a good punch of saltiness and flavor, the walnuts/pine nuts give so much richness, the crushed red pepper gives it that little kick and the extra virgin olive oil brings everything together! The ways you can use this pesto are endless. Mix with your favorite pasta and veggies, have it with some really good Italian bread, spread it on sandwiches, mix it in your tomato soup. One sauce- SO many options. All of them, delicious!
Ingredients
- 2 cups packed fresh basil
- 1/2 cup extra virgin olive oil
- 1/2 TSP crushed red pepper
- 1/3 cup grated parmesan
- 1/3 cup walnuts or pine nuts
Directions
- Heat a small pan to medium heat and toast walnuts or pine nuts for about 3-4 minutes. Let cool.
- Place basil leaves, crushed red pepper, parmesan and walnuts/pine nuts in a food processor.
- Process, and at the same time drizzle the extra virgin olive oil until all ingredients are fully combined.
- Taste for seasoning, if salt is needed add 1/4 TSP at a time.
Serving size- makes about 1-1/4 cup of pesto.
Storing suggestions- if you haven't used all the pesto and want to keep it for another day, store in a air tight container and drizzle a couple of TBSP of extra virgin olive oil to preserve. Refrigerate.

Sunday, August 5, 2012
Creamy Cold Coffee
We have officially reached the dog days of summer; this week, the temperature hit 107! So when I was brain storming about what to make for this week's post, I didn't have to think too hard because I wanted something cold and refreshing. I am a coffee lover and an avid coffee drinker but with it being so hot, I don't exactly want a hot cup of joe in the middle of the afternoon or after dinner. Today's recipe hits that spot on these hot summer days when you need just a little pick me up. Hope you enjoy it as much as I do!
Ingredients:
1 cup of cubed ice
1/2 cup milk (I use skim but you can use whatever you have on hand)
2 TBSP sugar (can also use splenda or another sweetener)
1 tsp instant coffee or espresso powder
1/2 scoop vanilla ice cream**
Whip cream & chocolate syrup to top (optional)
Directions:
Place ice, milk, sugar in a blender and pulse/ mix for about 30 seconds
Add instant coffee & ice cream and blend for another 30- 40 seconds
Serve in a tall glass with whipped cream and drizzle chocolate syrup on top
Enjoy!
Serving Size - 1
** Ice Cream is optional; you can use also use coffee flavored or chocolate ice cream. Frozen yogurt can be used for a healthier option.

Sunday, July 29, 2012
Mac n' Cheese bites!
These are little bites of cheesey goodness! I stumbled upon this recipe when I was making a regular mac and cheese dish, and thought it would be so much easier if you could have bite size pieces of this and it hit me! So I got out my mini cupcake pan, and it worked! I've made this a couple of times and it's always been a hit! You can always make it to your taste too! I've made American, Italian and Mexican versions of this, and the best part it's so easy to make! Try these at your next dinner or party event and I promise they won't disappoint!
Ingredients
3/4 cup of milk
1 1/2 cup of cubed velveeta
1/2 box mini penne pasta (or your favorite mini pasta)
1/2 TSP salt
1/4 TSP black pepper
1/2 cup breadcrumbs or crushed crackers
Italian Mexican
2 TBSP chopped basil 3-4 TBSP chopped cilantro
3-4 TBSP finely chopped sun dried tomato 1/2 can of rotel
1/3 cup mixed italian cheese 1/3 cup shredded cheddar cheese
Directions
- Preheat oven to 350
- Boil pasta in salty, boiling water til it is perfectly al dente. Drain. Rinse in cold water and set aside.
- In a small pan heat milk, when it's just about to come to a boil add velveeta cubes. Mix until smooth. Cheese mixture should have a queso consistency. (if cheese mixture is too thick add a little milk, if mixture is too thin add more velveeta).
- Add salt, pepper and ingredients from your favorite variation. Mix.
- Add cooked pasta to cheese mixture and mix until pasta is completed coated with cheese.
- In a mini cupcake pan, spray non stick oil and sprinkle some breadcrumbs into each cup.
- Spoon pasta mixture into the cups and top with breadcrumbs and cheese.
- Bake for 12-14 minutes, until cheese is golden and bubbly ontop.
- Let tray stand for a ten minutes before removing the mac n' cheese bites.
- Enjoy!
Serving size- yields about 24-30 mini mac n' cheese bites

-
Sunday, July 22, 2012
Mixed Daal (Mixed Lentil Soup)
Today's recipe is one of my favorite go to recipes because it's simple, fast, and easy to make. After a long day of work, I typically try to cook something hearty, delicious, and doesn't require a lot of time (and of course, good for you). A lot of times, on my drive home, I tend to call my mother and ask her for ideas on what to make for dinner. This particular dish is her recipe that she was nice enough to share with me. Thank you mom! :)
Ingredients:
1 cup Mixed Daal Lentils or equal parts chana daal (split bengal lentils), yellow moog daal (split yellow lentils), & masoor daal (split red lentils)*
1 TBSP EVOO (extra virgin olive oil)
1.5 tsp whole cumin
2.5 tsp green chili & ginger paste (I blended a serrano pepper & about 1.5 inches of ginger together)
1 tsp turmeric
2-3 small dried bay leaves
Handful of fresh spinach leaves
2.5 tsp lemon juice
1.5 tsp cumin & coriander powder mix
2 tsp sugar
Salt to taste
A little less than 1/2 tsp garam masala
Directions:
Wash lentils with warm water until the water turns clear.
Presoak lentils in hot water for 30 minutes.
In a pressure cooker, heat EVOO, and add cumin.
After a minute or so (you will smell the cumin roasting), add curry leaves and the chili & ginger mixture.
Add tomatoes, stir, and cook for about 2 minutes.
Add in the presoaked lentils and about a cup and a half of water (you should have equal parts water and lentils).
Stir in the turmeric, salt, & spinach.
Close the lid of the pressure cooker and cook for about 10-15 minutes.
After the cooker has cooled down (you can speed up the cooling process but placing the cooking in the sink and running cold water on top), open the lid and mix in the remaining ingredients.
Simmer for another 10 minutes
Enjoy with wheat tortillas and/or rice!
*The local Indian grocery store I shop at sells a prepacked bag called "Mixed Daal" which contains all of these lentils; however, they can be purchased separately at Whole Foods.

Sunday, July 15, 2012
Greek Salad & Vinaigrette
I am ALWAYS on the hunt for new flavorful foods! This greek
salad is my new addiction! I made this a few weeks ago, and now I can’t stop!
It's cool, crisp and bold, all, which are perfect for summer! It’s super
versatile too, you can have it as a light lunch or snack, or build it up and have it as a meal.
I usually make the dressing in bulk and keep it in the fridge for whenever I
want some next. This is a really great dish to make if you're going to a pot-luck, hosting a dinner or even when you get home and just
don’t feel like cooking! Have it with some soup or pita chips and enjoy! Bon apetit,
or Kali Orexi as the Greeks would say!
Salad Ingredients
- 2-3 cups chopped mixed greens (I like baby spinach and romaine lettuce)
- 1/3 cup cucumbers- sliced and quartered
- 4 kalamata olives pitted and sliced (regular olives are fine too)
- 6-8 cherry tomatoes halved
- 2 TBSP crumbled feta
- 1/3 cup cooked whole wheat pasta
- 3 mini sweet peppers diced into 1 inch cubes
Vinaigrette Ingredients
- 1/4 cup of extra virgin olive oil
- 1/4
cup of red wine or balsamic vinegar
- 1/4 TSP of salt
- 1/4TSP pepper
- 2 TSP honey
- 1
TSP fresh oregano
- 1/4 TSP red pepper flakes
Directions
- Combine all of the salad ingredients in a medium
sized bowl and toss.
- In a small bowl combine vinegar, salt, honey, pepper, red pepper flakes, oregano and mix.
- slowly whisk in the olive oil until the vinaigrette is fully combined.
- Drizzle 2-3 TBSP of the vinaigrette on the
salad and mix until well coated.
- Top with some fresh cracked black pepper.
- Store extra vinaigrette in the fridge.
- Store extra vinaigrette in the fridge.
Seving Size
- This salad makes one large dinner salad or two side salads.
Substitutions Additions
- Sugar for honey - Add 1/3 cup chick peas for extra protein
- Medium sized tomato for cherry tomatoes - Crumble some pita chips for crunch
- 1/3 cup diced red bell pepper for mini peppers
Substitutions Additions
- Sugar for honey - Add 1/3 cup chick peas for extra protein
- Medium sized tomato for cherry tomatoes - Crumble some pita chips for crunch
- 1/3 cup diced red bell pepper for mini peppers

Sunday, July 8, 2012
Chunky Jalapeno Hummus
Living in Texas, jalapenos & peppers might as well be a whole different food group because we add them to EVERYTHING!!! In our house, we always have a stock of hummus so that we can eat it with fresh veggies or pita chips. What you may not realize is that a lot of the store bought hummus is very fatty since it contains tahini. However, with my recipe, the flavor of the tahini is replaced with the spicy flavor of jalapenos. I also like my hummus to have more of a coarse texture as it holds better on the veggies. Hope y'all enjoy it as much as we do in our home! =)
Ingredients:
1 can chick peas (you can also use fresh boiled)
1/3 cup EVOO (extra virgin olive oil)
Juice of half a lemon
About 10 slices of pickled jalapenos
4 TBSP jalapeno juice (from the bottle of jalapenos)
1 tsp freshly ground black pepper
Salt to taste
Directions:
Wash the chick peas thoroughly
In a food processor (or blender), combine chick peas, lemon juice, salt, pepper, jalapenos, & jalapeno juice
Pulse/ Blend until all ingredients are mixed well
Stream in EVOO until you reach desired consistency
Enjoy with fresh bell peppers, baby carrots, celery, cherry tomatoes, and/ or pita chips!

Wednesday, July 4, 2012
Happy July 4th!
Let's salute all of the brave souls that fought and served for the pride and peace of our nation!
Hope everybody has an amazing day with friends, family and loved ones! Be safe! Happy 4th of July y'all!
Hope everybody has an amazing day with friends, family and loved ones! Be safe! Happy 4th of July y'all!
Sunday, July 1, 2012
English Scones
With the Olympics around the corner, and the Queen celebrating the diamond Jubilee, I felt it was appropriate to post a recipe from my home town- London! So, usually when most people think of food and England the first thing that comes to mind is tea, crumpets, scones and delicate sandwiches. All of these items are yummy, but English scones is one of the things that I miss over here in the States. Now English scones are different from the scones you get here in the U.S. English scones are not very sweet, usually have some dried fruit and served traditionally with jam and clotted cream (As they're not very sweet, I recommend eating the scones with a sweet and tart jam/preserve and a little butter). I used fresh blueberries in this batch, and though it tastes good, the blueberries burst in the oven and start to bleed so I would definitely stick to dried fruit! So while you're watching the London Olympics whip up a batch of these, pair with some earl grey and enjoy! :)
Recipe
1-2/3 cup of all purpose flour
1/2 TSP salt
1/3 cup sugar
2/3 cup buttermilk
2 TSP baking powder
1/2 cup your favorite dried fruit
4 TBSP cold butter cubed.
Directions
- Preheat oven to 350.
- Sift all of the dry ingredients together.
- With two forks or a pastry cutter, cut butter into flour until mixture resembles coarse crumbs.
- Add dried fruit and mix.
- Add buttermilk and mix with a wooden spoon or spatula (it should come together easily)
- Turn out dough onto a lightly floured surface, pressing lightly with your hands form a disk and saran wrap the dough. Place in fridge for at least an hour.
- After you have chilled the dough, on a lightly floured surface - roll out dough so it's 1-1/2 inch thick.
- use a cookie cutter/biscuit cutter to mold your scones, and place on a baking sheet that is lined with parchment paper.
- brush each scone lightly with milk
- Bake for about 12-14 minutes (oven times will vary) or until it is lightly browned on the top.
- Serve warm with your favorite jam!
Makes approximately 20 (2-1/2 inch) scones
Serving suggestion
- serve with your favorite jam
- Serve with butter or some sweetened fresh whipping cream.

Subscribe to:
Posts (Atom)